Saturday, October 29, 2011

A Girl’s Guide to Choosing an RV– my story

IMG_4589

Meeting Suzanne at the Hershey RV Show last month reminded me of just what an overwhelmingly difficult process it is to determine which RV is “the right one” to dump much of your life’s savings into.  One of the salesmen told her that 90% of all 1st-time RV buyers end up with a different RV within 3 years.  Unfortunately, he’s likely pretty correct.

It’s rarely possible to take a potential RV out for a few nights to “test it out” before buying, so unless a similar model is available as a rental, one usually must buy their RV without sleeping or living in it first, and without much of a test drive.

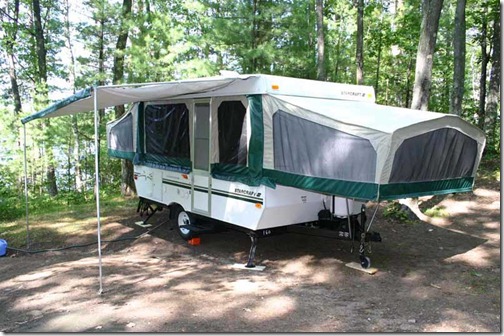
I’ve certainly been one of the salesman’s statistics.  In 2004, after a summer of cold and rainy tent camping in Canada, I decided to buy my first RV.   Meet my 1st RV-- a Starcraft 2406 pop-up tent camper!
830733217_7ae4b791f8_o

It was relatively inexpensive (under $10,000 new), was lightweight enough for my SUV to tow, and could sleep up to 6 people so I could bring lots of friends or family along.  I loved the openness and all-around views it provided:
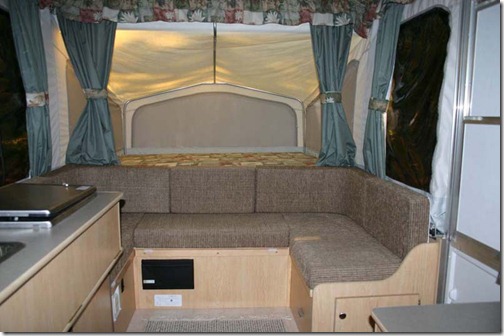
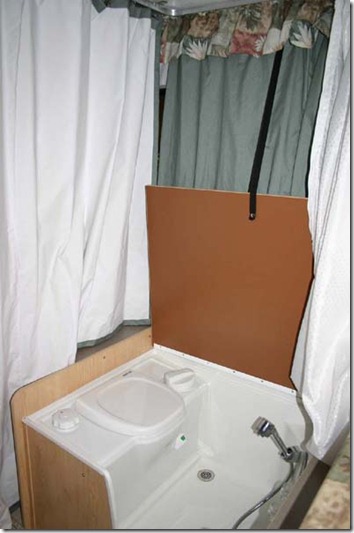
831601328_3f6ab34827_o and loved the idea of having my own toilet/shower combo without having to be near a bathhouse.
830734471_497a659ca5_o

The first few trips with the new pop-up were great, but I soon began feeling like it wasn’t right for me.  All the setup and tear down took a lot of time (and was miserable to do in the rain), there was very little storage available when it was in travel mode (and no way to access the fridge or bath when the roof was down).  

You also had to take your shoes off every time you used the toilet unless you wanted mud and scratches on the wet bath floor. The 20 gallon water tank (and no built-in gray tank), meant that using the shower was cumbersome (and insufficient if more than 1 or 2 people were needing it over the weekend).  Towing was also not a very pleasurable experience—the camper swayed excessively if I ever drove above 60 mph, and my electric brake controller would either brake way too much or way too little. 

Finally, it was not an ideal RV for the colder climates I liked to camp in—true, it was warmer than a tent, but if the outside temps dropped below 50F, the furnace had to cycle on/off almost constantly all night long to attempt to keep warm air inside the drafty tent walls.  Friends and family came along for a couple of trips, but it was usually just me camping in it, so it also felt bit too big for just me.

But the deciding factor to trade it came one night while camping in a rather deserted campground in rural Kentucky. A group of hunters had gotten lost in the night and nearly walked right into my camper!  It was an innocent mistake on their part, but the experience scared me half to death (imagine being awakened in the middle of the night to sounds of men and dogs, and seeing flashlights and gun barrels coming towards my bed…the only thing protecting me was the flimsy canvas and vinyl window, and a small steak knife I’d managed to pull out of the drawer when I hopped down onto the floor!). 

After that experience, I decided that I wanted and needed a hard-sided trailer with a door that could lock (not only more peace of mind from lost hunters in the night, but better for camping in bear country where pop-ups were prohibited).  But I still wanted something that could still be towable by my SUV, and something that could be expandable when I wished to bring guests along. 

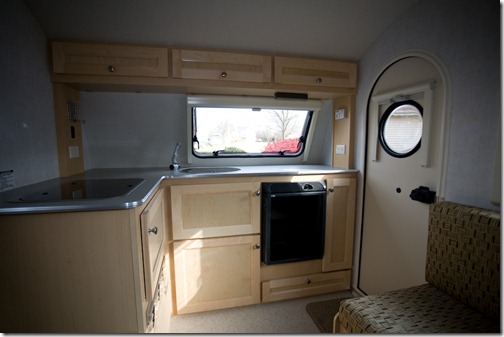
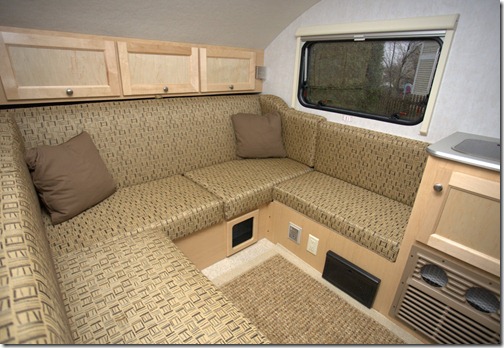
My dealer had just started carrying a line of super-cute teardrop trailers called the T@B, and I instantly fell in love with a T16Q model that my dealer gladly let me trade my pop-up for a few thousand dollars more.n_a
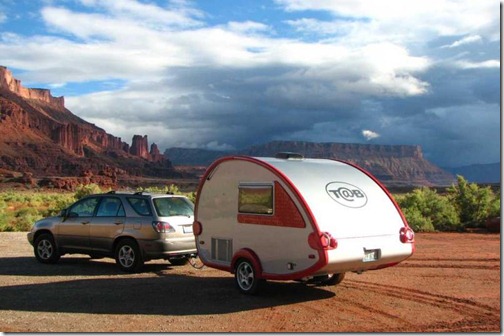
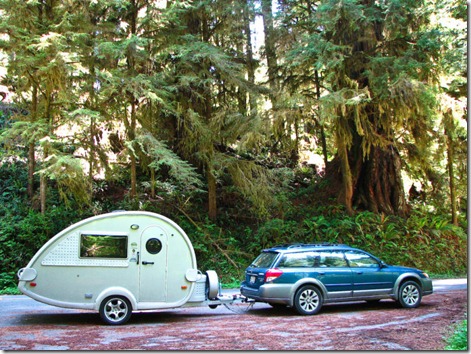
The T@B had a combination dinette/bed with a kitchen, large flip-out windows on 3 sides that provided great views of the outdoors, a porta-potti, and an air conditioner.  It also had a terrific screen room tent attachment that could double the living space when needed for extra guests.  It towed like a dream compared to the pop-up, and best of all, seemed to attract smiling, curious “T@B Gawkers” where ever we went!

As a weekend camper, it was a wonderful RV.  I also loved the active owner community and met many folks at T@B rallies who continue to be good friends.  When my first T@B was destroyed while being transported by a trucking firm cross-country in 2007, I replaced it with another nearly-identical unit and took many more great road trips around the country (see my T@B blog for chronicles of those adventures).
n_a (1)
_MG_0044 2053780842_2bafd9b3ce_o
With improved 3G cellular service and campground wi-fi,  I began working from the road during extended month-long T@B trips around the country.  It was thrilling and liberating to be so mobile, and by 2009, I wanted to take even longer trips, and even try snowbirding all winter away from snowy Chicago.  Only one problem-- the T@B was just not going to be comfortable or big enough for that long of a time period, and without a full bath and larger holding tanks, I’d be limited to just camping in RV parks with bathhouses. So I had a big expensive decision to make—get a motorhome, or trade my Subaru in for a pickup truck and buy a bigger trailer.

Of course you know which way I went on that decision!
IMG_1862

I had narrowed down my choices to a small motorhome or an Airstream trailer.  I didn’t want a traditional “rectangular boxy RV” and wanted something as stylish as the T@B’s interior.  I wanted something small enough to get into most campgrounds, but bigger and more comfortable than the T@B.  Most importantly, I wanted a real bathroom with shower and large enough holding tanks to be useful.

I decided that, as neat as the Airstreams looked, I just didn’t want to have trade my car in for a big truck to pull one.  I also didn’t want to struggle with towing and constant hitching/unhitching.  So, I began focusing in on motorhomes. 

In 2005, I had a wonderful week in Alaska renting a 25’ Class C motorhome from Great Alaskan Holidays.  It was quite a luxury from my pop-up tent camper, not only for the onboard generator, but the ease of having an instant climate-controlled rest stop or diner whenever I happened to pull off the side of the road (bathrooms and restaurants in Alaska are far and few between!).  I also loved being able to just drive right into a campsite, turn off the engine, open the door and be camping within 2 minutes…I could definitely get used to this!

I attended a few RV shows and visited a number of dealers.  Class B van motorhomes looked the least intimidating, were certainly easy to drive and got great gas mileage.  But the interiors, to me, felt even smaller and more cramped than my 12’ T@B!  Most had tiny fridges and tiny holding tanks too, which would mean more trips to the grocery store and dump station—2 tasks I do not enjoy.  Finally, most new Class B vans were more expensive than any Class C I looked at, so that ruled them out for me. 

On the flip-side thought, Class Bs did seem to be the safest of all motorhomes though as they were built as strongly as a passenger van. Also, if I were focused on “stealth urban camping,” a Class B van would be at the top of the list as it most easily blends in well with other vehicles in any parking lot or residential street.

Class A motorhomes (the big rectangular boxes on wheels) or a Conversion Bus might one day be in my future as a full-time rig, but they just seemed was too big a leap and too cavernous to migrate to from my tiny, cozy T@B.  These units certainly had all the comforts of home though, and tons of storage and holding tank capacity.

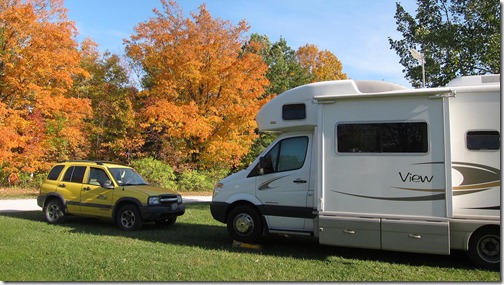
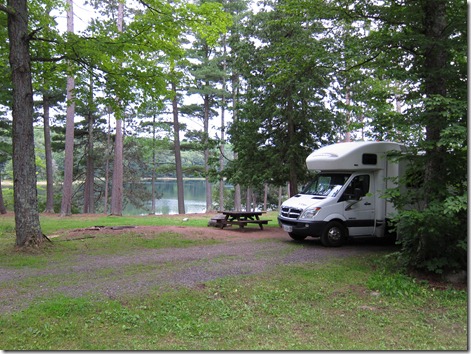
Finally, I focused in on 2 class C’s—the Winnebago View and the Winnebago Aspect.  Both had different pros and cons, but either really could have worked.  The Aspect was on a Ford gas engine chassis and had a bedroom in back but no cabover bed up front.  The View had just the opposite and was on a shorter, narrower, Mercedes diesel chassis.  In the end, I chose my View because it was a new prior-year model that was $20K cheaper than current-year Aspects, and had more external storage space than an Aspect.

I’ve now owned and lived in my View longer than any of my previous RVs.  Is it perfect?  No.  I’d be lying if I didn’t tell you that after a few months on the road, I really do look forward to returning home to my real mattress bed, comfy recliner and sofa, big screen TV and fireplace.  But for the “part-time full-timing” solo RVing trips I do right now, the View is about as close to perfect as I can get. 

The ultimate “work from the road” benefit to a small motorhome versus a trailer, is the fact that I can easily move it.  The best/fastest internet and cellular coverage is often closest to highways and towns, while the best campsites are at least a few miles away in the boonies.  It’s nice to be able to work in town during the day, and then retreat back to a pretty site in the woods or on a lake when the day is done.  It’s also nice to be able to easily  drive to a dump station when holding tanks are full rather than have to deal with portable “blue boy” tanks or being restricted to only full hookup sites.

At 24 feet, the View has yet to find a camp site it could not fit into, and the narrow width and short wheelbase has been a blessing on every curvy mountain road, u-turn, or construction zone I’ve ever had to drive. 

Is it a full-time home?  My jury is still out about that one.  It certainly is plenty comfortable for 1 or 2 people for a few months on the road, and I’ve read about a few dozen people who do indeed live full-time in their Views (i.e. no longer own permanent homes).  But they either have had to make significant compromises in what they could bring along (due to limited 1,000 lb cargo carrying capacity), or have still had some kind of storage unit or park model trailer keeping all their comfy stuff and heirlooms for post-fulltiming.

As a solo RVer who still has a home base to return to, a small motorhome has been the most-perfect RV for me at this stage of my life….now if I could just get Millie to relax and enjoy the ride.  The sofa is too bouncy to sleep on when rolling down the highway, and it’s hard for a dog to get her beauty rest!

Monday, October 10, 2011

Weekend in Door County Wisconsin

IMG_6735

When asked where she wanted to go for her weekend birthday trip, my mom chose Door County Wisconsin as it’s known for some of the best fall foliage in the region, and has plenty of shops, farm markets, and pubs to also enjoy.

Door County is the peninsula in northeast Wisconsin separating Lake Michigan from Green Bay that starts at Sturgeon Bay on the south end and extends about 50 miles up to Washington and Rock Islands on the north end.  There are numerous small arts-and-crafts kinds of towns on the coasts of the peninsula, with farmland and orchards occupying the interior land.  There are also a half dozen gorgeous state and county parks.

IMG_8229

We stayed at Tranquil Timbers RV Resort in Sturgeon Bay, another of the Encore/Thousand Trails parks on the ReadyCampGo program. The trees throughout the park were at their peak and just gorgeous.

IMG_8226
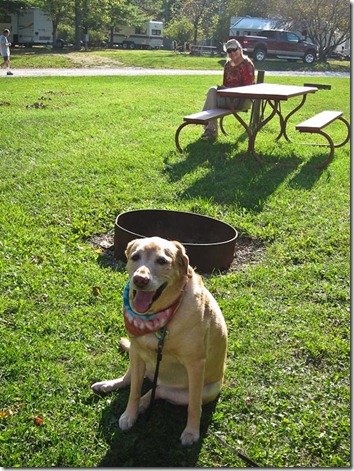
It was also a perfect Indian Summer weekend with clear blue skies and temperatures in the 70’s each day.  Millie and Mom soaked up the sun late Saturday afternoon!

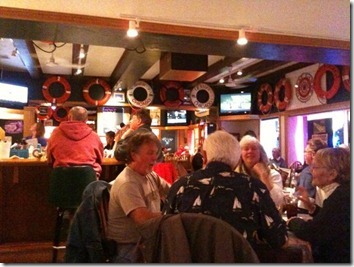
After slowly crawling out of the Friday afternoon congestion of Chicago and Milwaukee, we finally made it up to the campground just after sunset.  After getting parked at our site, it was off to the first of Mom’s favorite Sturgeon Bay restaurants—Neighborhood Pub & Grill.
pub

The place was packed and we had to wait a few minutes for a table.  The crowd also seemed to be intently watching the ballgame on the various big screen TVs.  Within 5 minutes, everyone in the bar let out a huge roar and one of the bartenders even set off a small firecracker.  We then realized what everyone was so excited about—the Milwaukee Brewers had just won their playoff series and were moving on to the NL Championship series! 

With the game over, some tables opened up and we ordered dinner.  It also happened to be their Oktoberfest weekend, so we ordered some of their German specialties with excellent red cabbage, spaetzel, and spiced apple sauce.

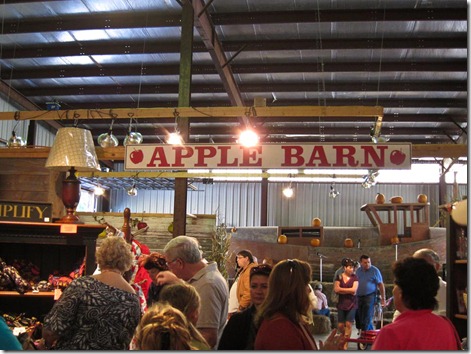
On Saturday morning, we drove up to Sister Bay to Mom’s favorite farm market, Seaquist Orchards.  We were a bit early for the bluegrass concert in the Apple Barn, but there were plenty of pretty fruits and pumpkins to enjoy, and Mom loaded up her shopping basket with apple cider, donuts, cherry pie, and other goodies to bring home.

IMG_8198 
IMG_8200IMG_8202IMG_8205IMG_8208

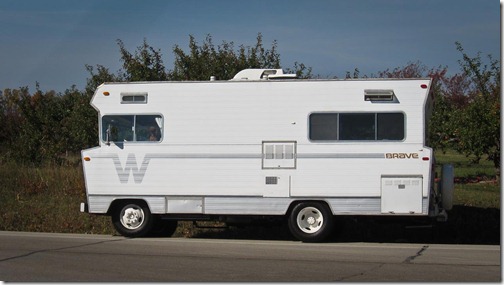
On the way out, I spotted this pristine vintage Winnebago Brave being driven by a poodle.  Apparently, Millie is not the only dog who likes to drive her Winnebago!
IMG_8209

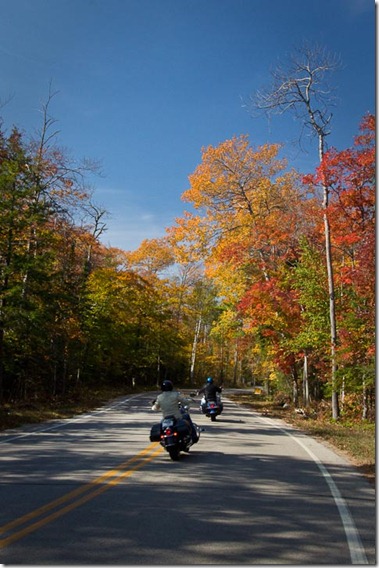
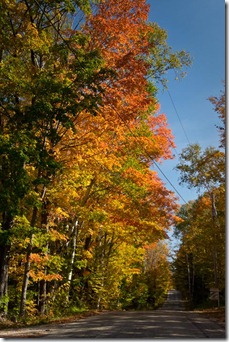
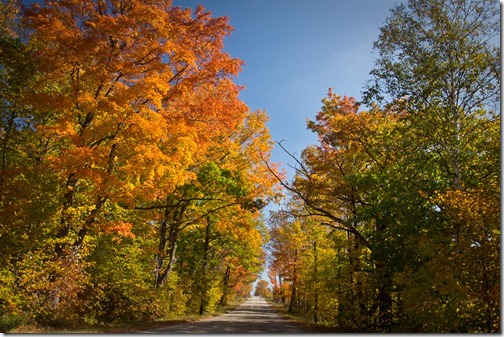
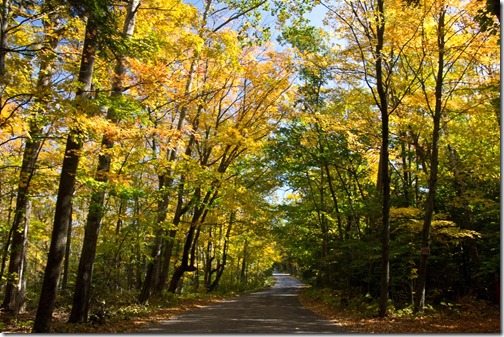
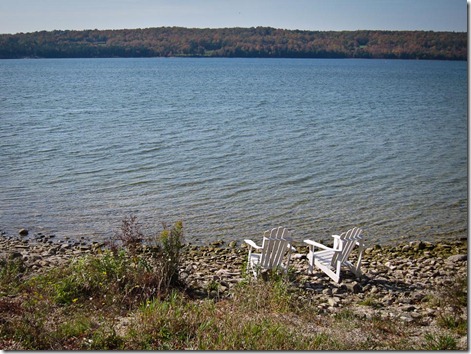
We then drove up to the northern tip of the peninsula to take some fall foliage pictures.  Lots of folks riding their motorcycles on these roads and enjoying the warm sunny day!
IMG_6726IMG_6728IMG_6733IMG_6734IMG_6735IMG_6748

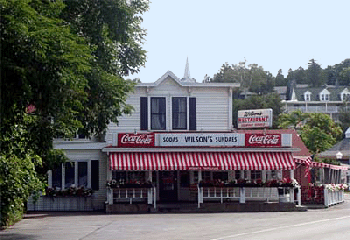
We zig-zagged our way back down to have lunch at Wilson’s and enjoy the pretty harbor at Ephraim.

dcbuilding1
IMG_8217

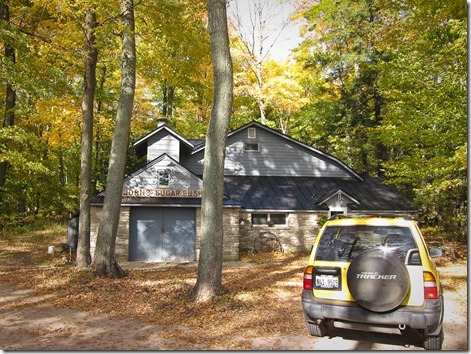
and then made our way down to Jorn’s Sugar Bush to buy some fresh maple syrup (is it obvious yet that my mom had a major craving for sweets this weekend?!!).
IMG_8221
IMG_6761IMG_6762

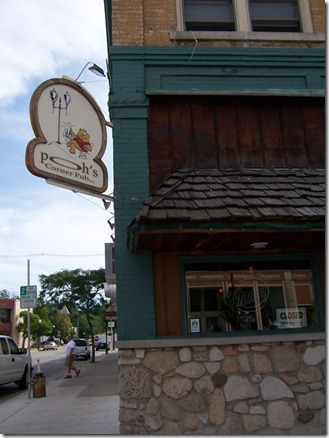
After returning to the campground to rest for a few hours, we headed out Saturday night to first visit Pooh’s Pub in downtown Sturgeon Bay (actually named Poh’s for the owner’s George & Kim Poh).  Kim is my brother’s roommate’s sister, and this bar has been run by their family for years.  We happened to arrive just as George and Kim were finishing up the day shift, and Kim’s other 2 sisters were starting the night shift!  After hearing so much about this pub from my brother for so long, it was great to finally stop in for a visit and meet the family.
pohscornerpub-540x720

We then made our way to Mom’s other favorite Sturgeon Bay restaurant, The Nightingale Supper Club.  This place looks completely unchanged from the 60’s/70’s and had a bar almost a big as the restaurant itself.  Good thing, too, because we had to wait 1 1/2 hrs before being seated for dinner.  But the atmosphere and food were both very enjoyable.

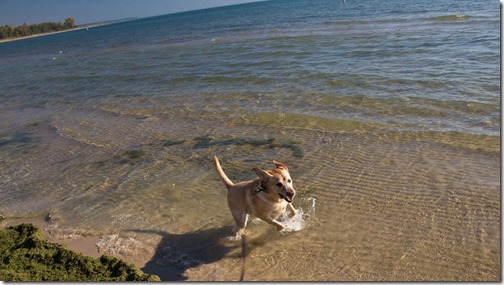
Sunday morning, we headed up to Jacksonport, where Mom recalled a small town park that allowed dogs on the beach of Lake Michigan.  Millie got in a quick fun swim before we had to head back to Chicago, so a great time was had by all!
IMG_6769

Sunday, October 2, 2011

Overcoming Dumpophobia – A Girl’s 12-step Guide to Dumping RV tanks!

When I was camping at Assateague last month, a man walked up to me and said “Can I pay you a compliment?”.  “Sure,” I replied.  He said he had watched me come into camp the night before and was just amazed that I could drive my own motorhome and unhitch my toad so easily.  He then was amazed to see me the next day as I paddled in to shore, deflated and packed up my Sea Eagle FastTrack kayak into the back of my Tracker.  He finished by saying “you’re one gutsy lady!”

While I know the gentleman meant well, and I politely thanked him for his compliments, I felt like saying “What alternative do I have?  Sit at home waiting for some man to come along? And miss out at being able to camp on the ocean shore and paddle this beautiful bay?!!!”  But I kept my mouth shut, smiled, and walked away.

My brother and I were raised to be independent and self-sufficient (perhaps to a fault!), but I was never told I couldn’t/shouldn’t do something just because of my gender.  While I envy my RVing friends who have husbands to travel with and help them with the more unpleasant and dirty tasks of RVing, I’ve never had that luxury. 

So, what’s a girl to do….stay at home?  Never!  I’d just have to learn to do those “manly” tasks myself.  Now that I’ve been RVing a few years and doing them, they honestly aren’t hard or unpleasant.   Even if you have a nice spouse who’s doing them now for you, it’s always good to learn these skills yourself in case of an emergency.

So on to the 1st and perhaps most feared of all female RVer phobias—dumping the tanks!

There are a variety of products available and methods to tank-dumping, so my way outlined below might not be the way you (or your spouse) prefer.  But, so far in 3 years, it’s a method that has worked well for me, and the supplies all fit nicely in my RV’s water/sewer compartment.  So, let’s get started:

The Tools I Use:
IMG_7602

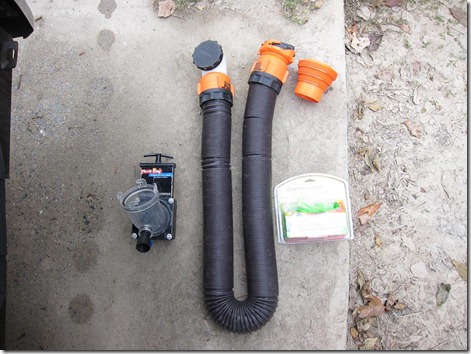
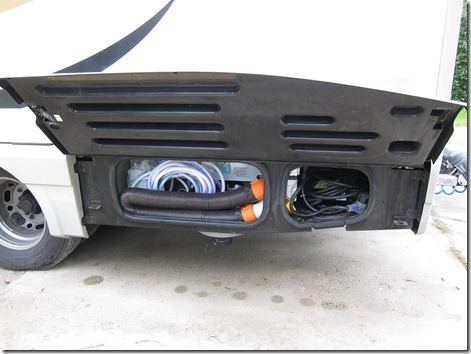
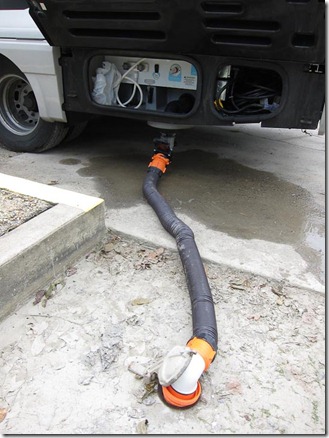
The brown hose with orange fittings is a RhinoFLEX kit. Clicking the link will take you to a great little video on how to use this product.  The kit is very reasonably priced at less than $30 on Amazon.  What I like about it most besides the ruggedness and durability of the hose, are the end caps and robust fittings.  While some old timers might recoil in horror, I store my sewer hose next to my fresh water fill hoses inside my RV’s utility compartment (because there are no other good external places to store these).
IMG_7600
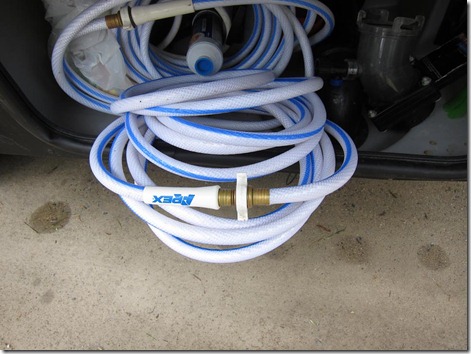
A few important things to note, though—the RhinoFLEX is always rinsed off and capped with caps facing away from the hoses.  The fresh water hoses are always connected end to end and stored with their connectors up away from the Rhino hose.  I additionally use an external water filter that is stored with caps on both ends of it to provide secondary filtering to all drinking water for the RV (the other filter is inside in the RV’s plumbing line).
IMG_7601

The black contraption to the left of the RhinoFLEX in the first photo above is called a Flush King.  It allows me to back-flush my tanks with either gray water or water from a hose to ensure anything inside the tank still stuck on the walls or bottom are flushed out (and thus eliminating potential problems with faulty tank level readings later on).  Here’s a link to a copy-cat product by Camco that has a short video of how this process works.  I like the Flush King better because it has an angled connector that’s easier for the limited clearance I have with the View’s sewer pipe.

The final item in the first photo above is a pack of disposable gloves to use while handling all sewer-related items.  These aren’t required, but do help keep germs minimized before washing hands later.

My RV Dump Process Step-by-Step:

Because I back-flush with every dump, my process involves a few extra steps that you would not need to do if just using the RhinoFLEX directly.  But here’s how I do it:
IMG_7604
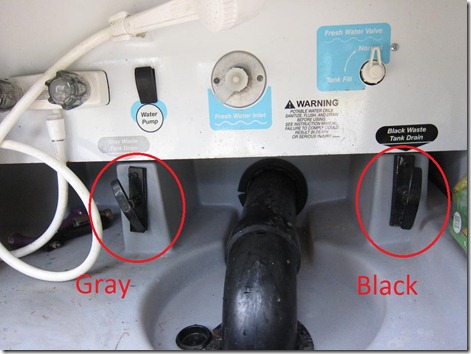
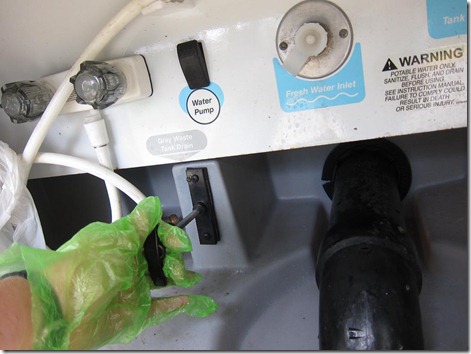
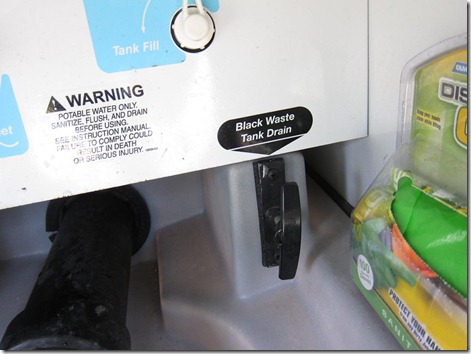
1. Ensure both Black and Gray valves on your RV are pushed fully closed (in).   You don’t want any surprises greeting you when you open your RV sewer drain cap!

IMG_7605
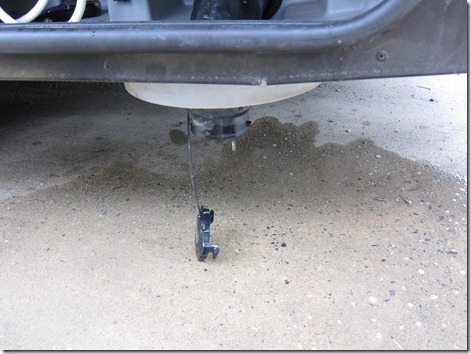
2. Unscrew the RV’s sewer drain pipe cap.  The seal might be a bit “gritty” and hard to turn, so give it a good strong grip and turn it clockwise.  Note that mine seems to release a few cups of gray water when I do this (so be sure your gloves are on!).  I likely have a small gap or particle in my gray tank release valve seal right now that’s causing it to leak slightly.  Ah, the joys of RV ownership…always some small thing to get fixed!

IMG_7606
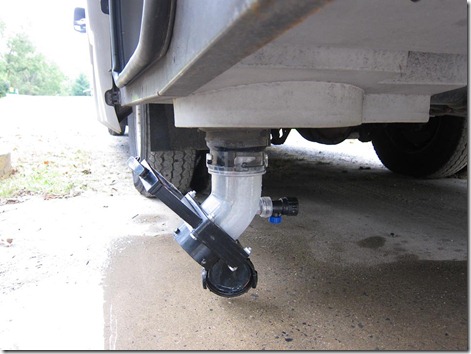
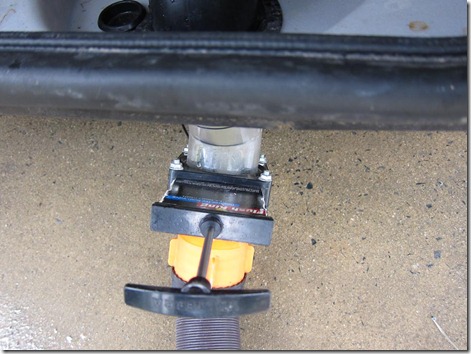
3. Attach the Flush King to the Drain Pipe Bayonet.
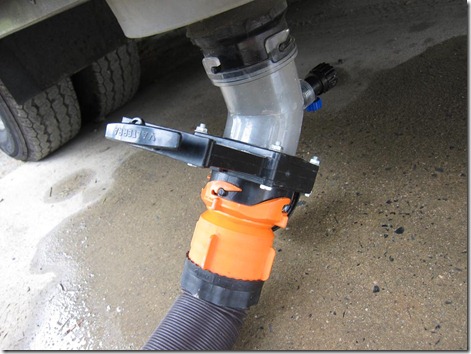
(Skip this step if not back-flushing). Twist the Flush King counter-clockwise until the 4 little plastic prongs on the RV’s Drain Pipe click into the 4 little C-shaped tabs on the Flush King’s connector.  Make VERY SURE that all sides are secure and fully “clicked” into place.  The Flush King’s clear pipe should feel like a solid extension of your RV’s drain and should not wobble at all on the bayonet.

IMG_7609
4. Remove the end cap from the RV-side of the RhinoFLEX. Twist the cap to unclick it from the hose’s bayonet fitting.

IMG_7610

5. Connect the RhinoFLEX to the Flush King. This is the exact same bayonet fitting as in Step 3, so follow the same process to connect it, again being sure that all 4 prongs are securely clicked all the way into the C-shaped grippers (if not back-flushing, you’d simply connect the Rhino directly to the RV drain connector).

IMG_7611IMG_7612

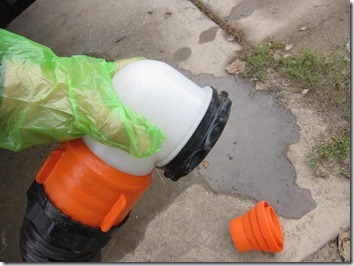
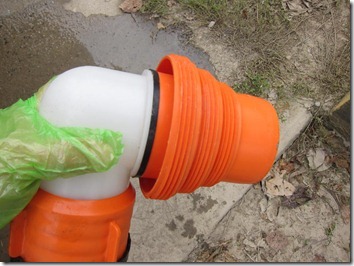
6. Remove the black end cap from the Sewer-side of  RhinoFLEX and attach the orange threaded fitting. This is a bayonet-type fitting as well.  There are 4 small tabs on the hose end that fit corresponding notches on the inside of the end cap or threaded fitting to twist and lock these onto the hose.  Whenever possible, it’s better to actually screw the orange threaded fitting into the dump station’s drian pipe and THEN connect the RhinoFLEX to the fitting.  But at some dump stations, the drain pipe is unthreaded and just has a metal flapper cover (like this example), so in this situation, I attach the threaded fitting to the hose first.

IMG_7613Yard Cleanout

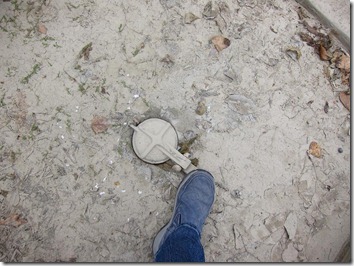
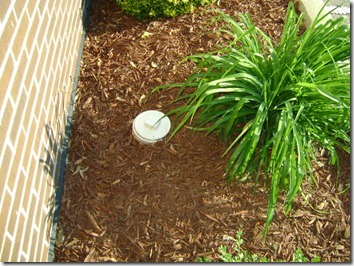
7. Open the Dump Station’s Sewer Drain Cover. At a dump station, you’ll usually see a metal cap with a little foot lever to open it.  At a full hookup RV site, the sewer pipe will usually be a white PVC screw-off cap with a sqaure grip on top.

IMG_7615

8. Extend the RhinoFLEX hose and secure it into the Dump Station sewer drain.  Again, if the sewer pipe has threads, screw your orange fitting into that first.  If the pipe is unthreaded, be sure something heavy rests on top of the Rhino’s white elbow to keep it securely in the sewer drain. 

NEWBIE TIP: I once thought that if the sewer pipe didn’t have threads, there’d be no need to connect the orange fitting to the Rhino, and I simply had the white elbow placed directly into the sewer drain.  As soon as I release the black tank I realized my error as the hose jumped out of the sewer and spewed my black tank waste all over the dump station. What a mess that was to clean up!

IMG_7617IMG_7620

9. Bombs Away!  Release the Black Tank contents into the sewer. This is the moment of truth that will confirm whether or not your connections were all securely fastened!  I first pull the Black tank valve handle all the way open (out).  When I see the tank contents fill up the clear pipe of the Flush King, I then pull open the FK’s valve to let them proceed on to the sewer. 

NEWBIE TIP:  Keep your hand on the valve and watch the hose/sewer when you first release.  If any sign of problems, immediately push the valve closed again.  I made the mistake once of opening the valve and walking over to the sewer to watch progress there (remember the tip above about the orange fitting?).  Well yep, when the hose jumped out of the drain, my shoes got splashed and trashed, and it seemed like an eternity to get back over to the valve to close it again!  Take your time, stay close to the valves and away from the sewer, and don’t let anyone or anything distract you while the valves are open!!!

IMG_7622

10. Once the Black Tank is done, Drain the Gray Tank (and back-flush if you are using a Flush King). Now if I didn’t have my Flush King in place, all I’d be doing is rinsing the Rhino hose with the gray water when it drains into the sewer.  I’d not have any easy way to rinse the black tank.  But with a Flush King, I can back-flush gray water into my Black tank first before sending it down the sewer hose.  This cleans out the “leftovers” on the bottom of the black tank before they have time to harden and cause blockages inside the tank later on.  

I do the following “dance of the tank valves” sequence to back-flush the black tank.  It reads much more complicated than it actually is…trust me! 

1. Keeping the black tank valve open, I close the Flush King (FK) valve. 
2. I then open the Gray tank valve which fills the FK clear pipe then begins backing up into the open black tank. 
3. Once I hear it stop moving, I close the Gray tank valve.
4. I then open the Flush King valve sending the backflushed black tank contents on to the sewer.
5. Once drained, I repeat these 4 steps again to push more gray water over to flush the black tank until I see clear water draining from the black tank (via the Flush King’s clear pipe).
6. I finally close the black tank valve, open the Flush King valve, and then open the gray tank valve to send it’s final contents on their merry way.
7. Once the gray tank is empty, I close the gray tank valve and keep the Flush King valve open another minute or two to ensure everything has drained from the RV drain pipe.  I then close the Flush King valve and tank dumping is complete.

NEWBIE TIP: A few times a year, if I want to get my black tank really good and flushed, rather than do the dance of the tank valves with gray water flushing, I hook up a garden hose (NEVER a white fresh water fill hose!) to the hose fitting on the back of the Flush King, and rather than back flush the black tank with gray water, I back fill the tank with water from the garden hose and get the tank filled as much as possible.  I repeat this process a couple of times to ensure that the side walls of the black tank are good and clean.  This process is easiest performed while at a full hookup campsite where the water spigot and sewer drain are fairly close to each other.

IMG_7628 
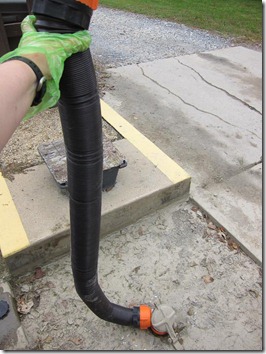
11. Disconnect, drain, & rinse off the RhinoFLEX and Flush King. Stow everything back in the RV and re-attach all caps.  Once all valves are closed again, I disconnect the Rhino hose from the Flush King/RV and hold it up directly over the sewer drain.  If I have access to a non-potable water supply (most Dump stations have a water spigot like this painted in red and/or has a non-threaded hose attached to it near the sewer drain), I’ll rinse some of this water down the hose into the sewer drain, then I’ll disconnect the orange threaded fitting and Flush King and rinse those items off as well.  I’ll then reattach the Rhino end caps and the RV’s drain cap and stow all items back in the RV.

IMG_7629
12. Rinse the dump station down, dispose of your gloves, wash hands, refill your black and gray tanks slightly, and be on your way! Proper Dump Station etiquette is to take the non-potable water hose and rinse off the area around the sewer drain and beneath your RV’s drain pipe.to ensure the station is clean for the next RVer to use it.  NEVER use this water supply to fill your fresh water tank.  There will usually be another water spigot further away for that purpose.

Once the Dump Station is back in order, come into the RV to wash up and refill your tanks with a gallon or two of water to prevent the tank bottoms from drying out (run the kitchen faucet and toilet sprayer a minute or two).

If there are line of RVs behind you, you’re best best is to skip the Flush King back-flushing process, quickly dump your black and then your gray tanks, and save the back-flushing for another day.

Sewer Hose Usage at Full Hookup Sites – the great debate! 

Some folks think because they have a full hookup site, they must drag out the sewer hose and connect it as soon as they arrive. I suppose if you’re planning to stay at in-place for over a week, that might make good sense, but otherwise, keep your hose packed away from the harsh sun and only bring it out when you need to dump.  My RhinoFLEX is now 2 years old with no signs of pinhole leaks or other problems due to exposure to the elements.

NEWBIE TIP:  If you do plan to stay at one site awhile and hook up your sewer hose, do NOT keep the black tank valve open!  Not only will you get some pretty strong sewer smells whenever you flush your RV toilet, you’re also very likely to develop a dried up “pyramid” at the bottom of your black tank due to insufficient liquids to keep things afloat.

Now I guarantee that you’ve just spent more time reading this lengthy post than it will actually take you to dump your tanks!  But after dumping a few times, you’ll have the process down.  While I’m not sure any RVer ever comes to love tank-dumping, girls that dump their own tanks certainly will feel a sense of accomplishment and independence!  Go ahead, give it a try!

Lynne's Camera Bag

Best RVing Stuff Under $50

Join Us On Facebook