Friday, December 30, 2011

A Gift of Faith

My post today has nothing to do with RVing, but celebrates the 100th anniversary birth date of my grandmother, Lockie, and the gift she ultimately gave me of finding everlasting Faith. 

I’ve never been a very religious church-goer in my life, but like many others drawn to the outdoors, I often experience the greatest sense of spirituality when out in nature.  I feel much more connected to God on a Sunday morning when paddling a quiet pond or watching a magical sunrise, than praying from a church pew.  But it wasn’t always that way.

Lockie 1935

My grandmother was born in 1911, the youngest of 4 girls in a deeply religious Baptist family.  They moved to Augusta, Kansas when she was still a child, and it was there in the 1930s, at the height of the Great Depression, that she met my grandfather, Ray, who ran the portrait photography studio in town and preached at a small church out in the country.

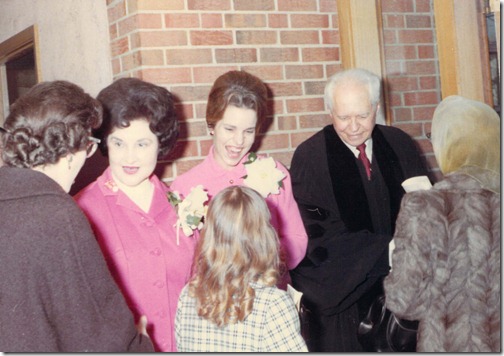
Ray Lockie and Suzy greeting congregation at Hyde Park_1960s

They were an inseparable team for nearly 50 years, spending much of that time in Kansas City, where they raised my mother (their only child) and grew a large congregation at the Hyde Park Christian Church.  He was the inspirational preacher, and she, the devoted preacher’s wife who sang in the choir, taught Sunday School classes, and organized countless church socials and pot luck suppers.

My earliest memories were of the summers with my grandparents in the late 1960s and early ‘70’s.  My grandmother would often sing and play hymns and Broadway show tunes on the piano. When I was old enough to learn, she first taught me one of her favorites, “Edelweiss” from The Sound of Music. For years afterwards, whenever we’d hear that song on the radio or TV, she’d say “they’re playing our song, honey!”

After my grandfather died in 1979, I had a hard time finding as meaningful a connection with any church or minister as I had felt when listening to him preach.  My grandmother tried relentlessly to get me to attend church more otten—“You can meet a nice young man there!” she’d often say.  But, by then, I was a young adult with my own ideas, and being an obedient young church girl was not one of them!

Lockie Baker 2003 

By 2000, when my grandmother was nearly 90, I moved her up to a retirement home near my mom’s house in Chicago.  By then, dementia had began ravaging her mind, and the religious pleadings had subsided.  Despite the circumstances, we had some wonderful times together in those final years and I got to see my grandmother much more often than I had in years past.

I also started ever so slowly to re-examine my skepticism towards Faith. There had been a couple of small coincidences and little miracles that my logical secular brain simply could not provide a rational explanation.  I was drifting closer towards God, but wasn’t 100% convinced just yet. 

Then, on one sunny December morning in 2005, my grandmother helped provide the final leap of Faith that I’d been needing.  My mother and I had been at the nursing home all night long holding my grandmother’s hands as she peacefully slept in her last few hours of life.  Christmas music blared over the loudspeaker continuously, and it honestly got a bit annoying at times.

About 30 minutes after my grandmother passed, my mom and I began gathering a few of her things to take to the car.  As I walked down a long hallway of the nursing home, I suddenly heard music over the loudspeaker that could not have been more crystal clear a message to me—this song was no ordinary Christmas Muzak from the night before.  Out of the millions of songs to be playing that morning, it was “Edelweiss,” indeed, our song!

My Faith has never waivered again since that day. It was my grandmother’s last and most precious gift to me.

Thursday, December 22, 2011

Holiday Happenings

Millie Xmas 2008
Millie the Jingle Dog in 2008

I posted these photos on my T@B blog a few years ago, but they're still some of my favorites of Millie celebrating the first snowfall of 2008 out in the backyard.

This winter has been a bit more challenging for Millie.  She had surgery last week to take care of some minor things, and the vet discovered a cancerous tumor on her rear paw that could not be completely removed.

So, it looks like Millie will have to endure a few more visits to the vet in the coming months as we figure out the best treatment plan.  The good news is that it doesn't appear to be the very worst kind of cancer, so the odds look promising.

In the meantime, Millie is enjoying all the extra treats and toys she's been getting lately, and is looking forward to this season's first big snowfall in the backyard!

Millie Xmas 2008_surprise

Millie Xmas 2008_frisbee


While I may not have any travel posts for the next few months, I do plan to get more tech and general RVing posts completed.  Tech changes so quickly, that the posts I did last winter on Mobile Productivity are now getting pretty outdated, so lots of new toy and app discoveries to share with you soon!

Just noticed today that we're now up to 50 friends following this blog...wow!  My deepest thanks to everyone for all the kind and helpful comments you've made.  It was also great fun to finally meet some of you in-person this year and I hope more of us can meet up next year as our travels align.

Wishing everyone a very enjoyable holiday season & a joyous new year!


Saturday, November 19, 2011

A Girl’s Guide to RVing with a Toad

 097

Ever notice that many solo women RVers do not have towed vehicles (or “Toads” as they’re affectionately called)?  Seems like almost all of us start out with an aversion to towing a car—“keep it simple” we say, “don’t want to overly complicate things.”

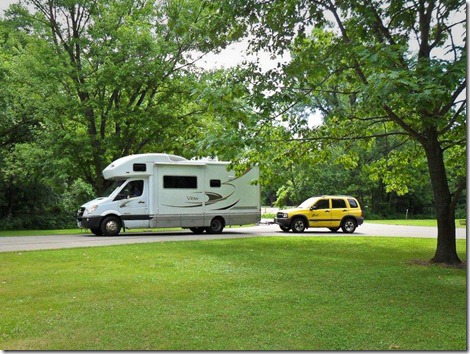
Certainly, towing a few thousand pounds behind your RV does add some complexity and limitations to your routine.  The biggest drawback: you can never back up without unhitching the toad first.  While this can be a major limitation with longer motorhomes, I’ve found that with my 24’ View, I’m still able to U-turn out of most situations and navigate smaller gas stations almost as easily as when not towing.  I do have to avoid small parking lots that only have 1 entrance/exit though.

Hitching and unhitching a toad can be done in less than 5 minutes once you get the hang of it.  There are a variety of towing solutions and a variety requirements for each particular tow car, so some of the steps below may not apply to your setup, but in general, these are the main ingredients and steps I follow.

The RV-side:
IMG_7631

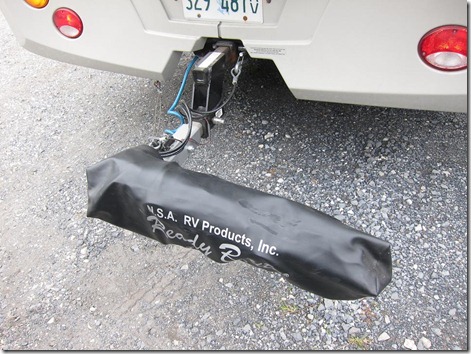
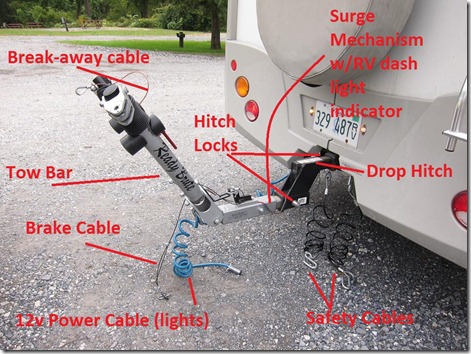
Tow bars either usually stay on the RV or stay on the toad.  Many RVers like the former as you can collapse and cover them when not in use, while leaving the front of your tow car free of any large, heavy towing equipment (but the car-side tow bars are certainly quite cheap!).

Many RV hitch receivers are higher than most small tow cars, so a drop hitch extension is needed (the black thing under the license plate that the silver tow bar attaches to).  I also have 2 hitch locks to keep deter theft—one locks the drop hitch to the RV, and the other locks the tow bar to the drop hitch.  The tow bar weighs about 40 lbs, and drop hitch another 15, so I usually just keep it on the RV all the time rather than fool with removing it (I do unplug and stow the blue power cord – those things are easily stolen if not watched!)

The Car-side:
IMG_8250
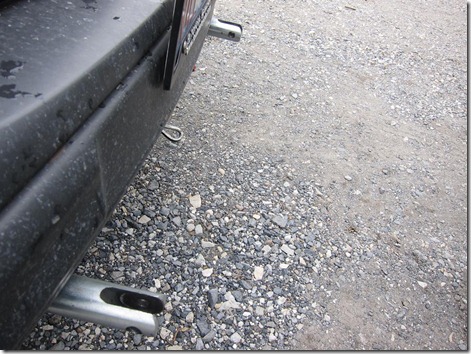
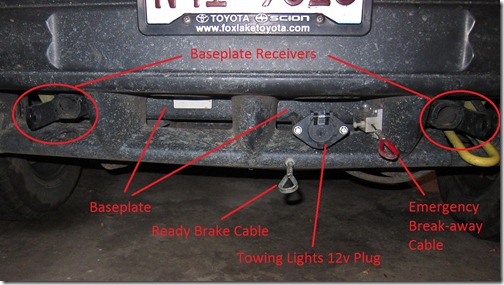
Ok, forgive my tow car’s dirty bumper!  Click this picture to view larger.  I’ve got a Blue Ox baseplate with a ReadyBrake braking system.  The black baseplate as well as it’s 2 black receivers are concealed behind the bumper and nearly invisible when driving around town.  Some other baseplate systems, such as Roadmaster, only mount their receiver components to the car and have their main horizontal bar out in front of the bumper.  While some folks (or some vehicles) find this more preferred, I didn’t want to fool with a heavy long bar to attach/remove and store, so chose Blue Ox instead.

The Silver and Red Loops are part of my ReadyBrake system.  There are a dozen different braking system designs for towing cars—some tap into the car’s brake system to activate it’s hydraulics, others are portable “lunchboxes” that you place on the floor between the driver’s seat and brake pedal.  These boxes have an arm that clamps onto the pedal to activate the brake.

Since my Tracker requires that I run the engine and put the transmission into gear every 200 miles of towing, I knew the portable box system would not be practical, so thought the ReadyBrake would be the least intrusive and easiest system to go with.  It basically is a small cable that runs from the silver loop you see pictured to the back of my car’s brake pedal.  When the tow bar’s surge mechanism compresses (i.e. when the RV starts braking or goes down a big hill), it pulls on this silver loop to pull the car’s brake pedal.  Simple, and no electric, air, or hydraulics required.

As an added safety precaution, a secondary brake cable is installed (the red loop) which will activate the car’s brakes if it should ever “break away” from the tow bar and RV.

The final car-side component are towing lights.  Here, too, there are a variety of solutions available.  For my car, the installer put a secondary bulb into each rear tail light housing and ran separate wiring between these new bulbs and the 12v plug on the front bumper.

The Goodie Bag:
IMG_8252IMG_8254


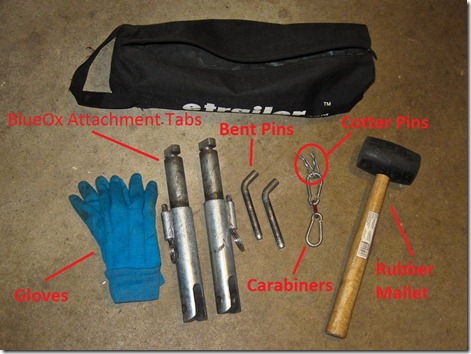
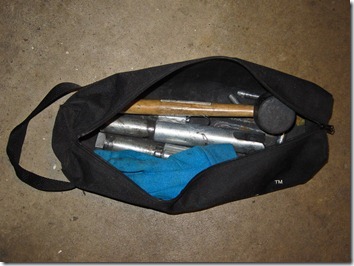
For all the small connectors and tools, I keep these in a zippered canvas tow hitch bag.  This bag stays in the car all the time and keeps things from getting lost.

My hands used to get dirty when hitching up until I started using a pair of cotton garden gloves. Duh!  Also, the first time I went to unhitch my car and found the bent pins hard to remove (which hold the tow bar to the car), I realized I needed to also carry a rubber mallet to give those stubborn pins a whack.  All of the other items shown came with the Baseplate or Tow Bar.

Hitching Process:

1. Prepare the RV-side for towing:
IMG_7636


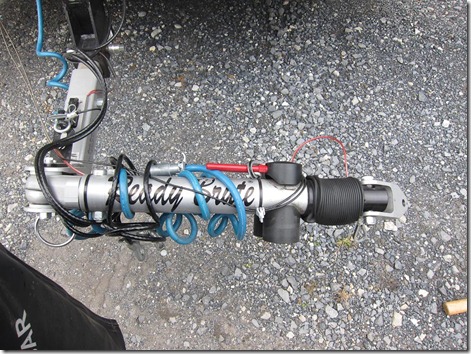
The vinyl tow bar cover just has a Velcro flap and is easily removed to reveal the tow bar and various cables. I unwrap the cables to free up the bar, and then tilt the bar upward and spread it’s arms apart.
IMG_7637

2. Prepare the Car-Side for Towing:

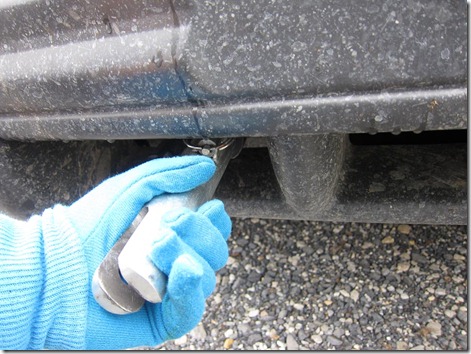
I get my Goodie Bag out of the car, put my gloves on, and take each of the large Blue Ox attachment tabs and insert them into the baseplate receiver holes.  The tabs are very heavy-duty (about 5 lbs each), and simply twist and lock into place.
IMG_7634IMG_7635

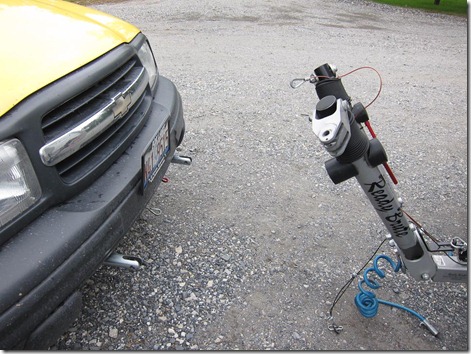
I then drive the car into position behind the RV.  I’ve become familiar enough now to know when I see the front hood of the car showing right below the RV license plate, that I’m close enough for the extendable tow bar arms to reach the car.
IMG_7638

3. Extend the Tow Bar Arms to rest on the Baseplate tabs:
IMG_7641


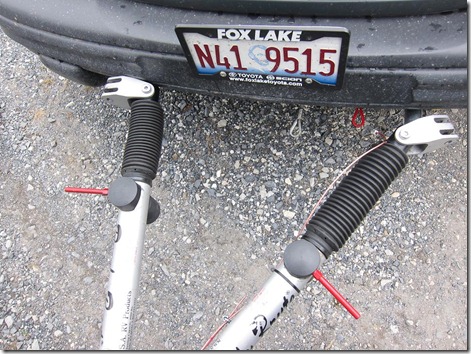
Now if I’ve positioned the car right, the tow bar arms will be able to rest on top of the silver baseplate tabs protruding from the car.  Notice here the car is at a slight angle to the RV because one arm is extended further than another.  This is why you want to pay more to buy a tow bar with adjustable extension arms—no need to be super precise when positioning the car!  

Note also that the red levers on the tow bar are in the out position to allow the arms to extend freely.

4. Connect the Tow Bar to the Car:

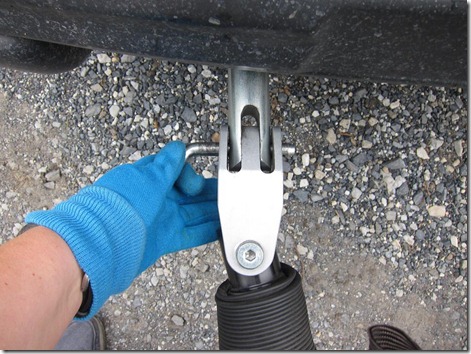
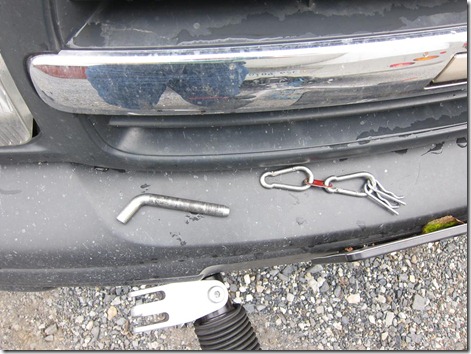
Now I take the small connectors out of my goodie bag, and connect the arms to the silver attachment tabs using the bent pins.
IMG_7642IMG_7643 

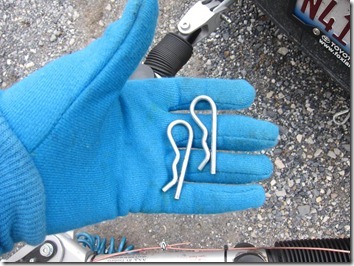
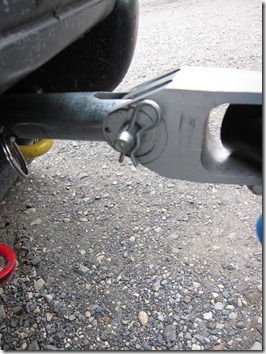
Once the bent pins are in place, I put a hairpin cotter on each bent pin to keep it locked in place.
IMG_7645IMG_7647 

5. Connect the Cables:

Now that the car is attached to the tow bar, it’s time to connect all the remaining cables.

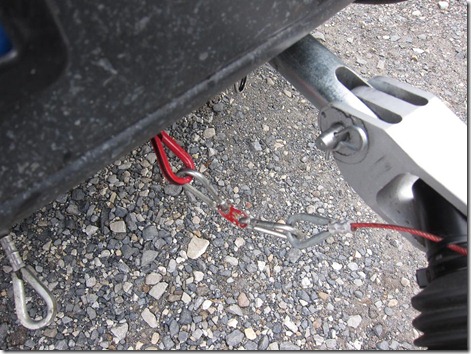
I take the pair of carabiners to attach the emergency break-away cables together:
IMG_7649

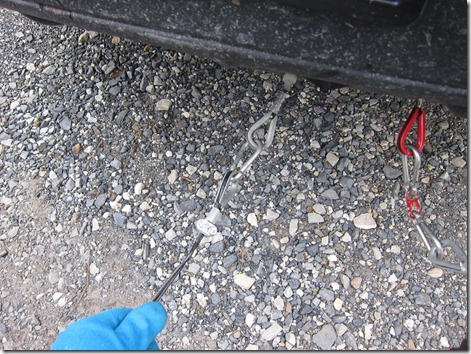
Then clip the carabiner from the black brake cable to connect the ReadyBrake surge mechanism to the car’s silver brake cable loop.
IMG_7650

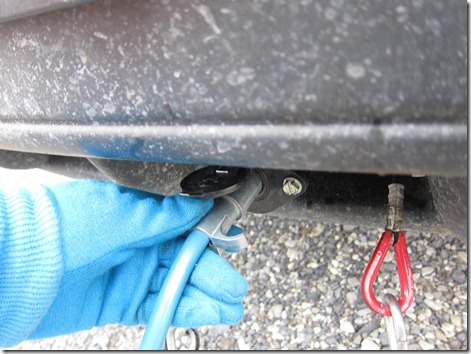
I next plug the blue 12v power cord into the 12v plug on the car’s front bumper (to power the car’s tow light bulbs with power from the RV).
IMG_7653

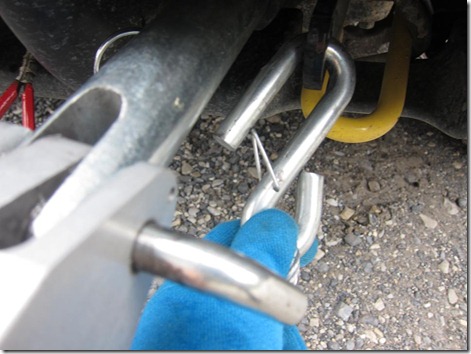
And, finally, connect the 2 coiled black safety cables into the 2 connector holes extending from the baseplate.  These safety cables keep the RV and Car connected to each other if the hitch or tow bar connections should ever fail.
IMG_7655 

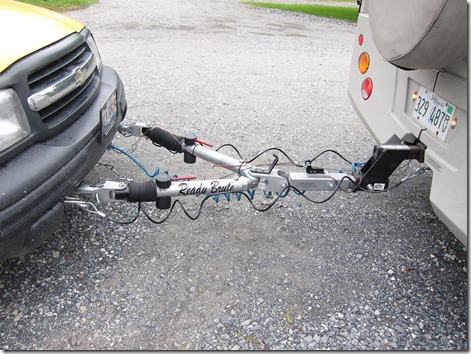
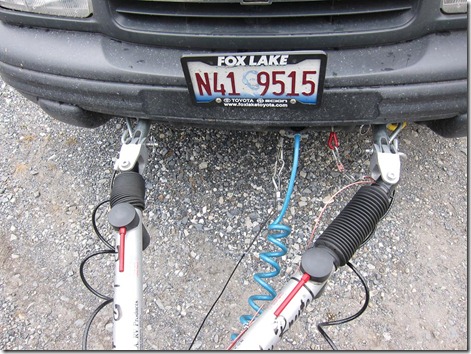
When everything is finally connected, it looks like this:
IMG_7657IMG_7659

Notice now that I turn the red arm levers forward.  This will prepare the arms to lock in place once they fully extend.  Eagle-eyed observers will see that I don’t have my safety cables “cris-crossed” beneath the tow bar.  While this would be the recommended way to connect them (so that if the tow bar ever fails, it will be “cradled” by the cables and won’t scrape the ground), my cables are still new and rather stiff, so I prefer right now just to connect them in parallel.  There is a metal loop beneath the center of the tow bar, that I feed the blue power cable through to keep it from drooping on the ground.  I’ll eventually use it for the safety cables as well once they stretch out more.

6. Ladies (and Gentlemen), Start Your Engines!:

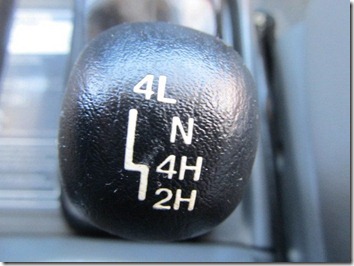
Now it’s time to get the toad ready for “free wheelin’”.  Each vehicle is a bit different on how to do this.  Many cars just have you place the transmission in Neutral, but READ YOUR CAR’S MANUAL before ever attempting to flat tow it behind a motor home!  Otherwise you’ll be buying yourself a new transmission! 
2CNBJ734236919874-21

My 4WD automatic transmission 2003 Chevy Tracker has a Hi/Low Transfer Case, so in my situation, I start the engine, put the Drive Transfer case into Neutral, and leave the Transmission still in Park.  Although this sounds completely crazy, you’re able to hear and feel the Transfer Case disengaging the drive shaft from transmission, so once you let up on the brake pedal, the car’s wheels are now free to roll.

With the Transfer Case still in Neutral, my car’s manual instructs me to put the Transmission into Drive, rev the engine to 2000 rpms for approximately 2 minutes, and then return the Transmission to Park.  This step allows all the critical parts to get lubricated before taking off down the highway.  I must repeat this step every 200 miles (which happens to nicely coincide with gas station or rest stops anyway).

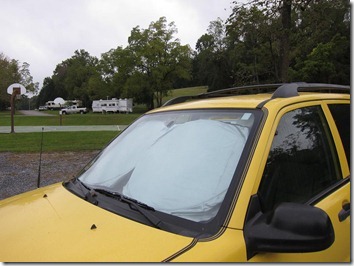
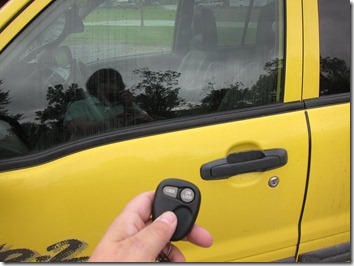
Once finished with that step, I turn the engine off and put it into the “1st Accessory” position and leave the key in the ignition (this allows the steering wheel to stay “unlocked” and front wheels to turn side to side).  I had a spare key made just for this purpose so I could carry the remote lock keyfob with me to lock the car.  I also put a sunshade up to keep the car interior from getting too hot and to further visibly show the car is being towed.
IMG_7670IMG_7669

7. Final Inspection
Once the toad is ready to roll, it’s time to start up the RV, check the lights, and re-check all towing connections. 

It’s ideal if you have a second person to stand behind the toad and confirm that each turn signal and brake lights work, but since I often travel solo, I turn the RV’s hazard lights on instead.
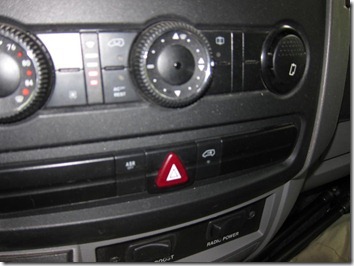
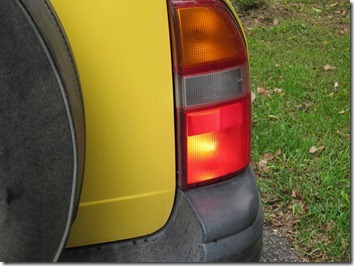
IMG_7672IMG_7674

Notice my Tracker’s amber turn signal lights do not light up—only the dedicated secondary tow light bulb (in the lower red casing) does.

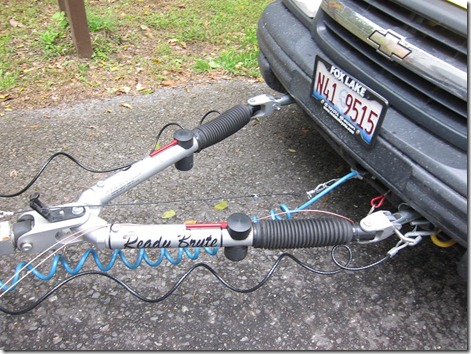
I drive the RV forward a few feet and then give everything a final inspection, making sure that the tow arms have now fully extended and locked into place.
IMG_7673

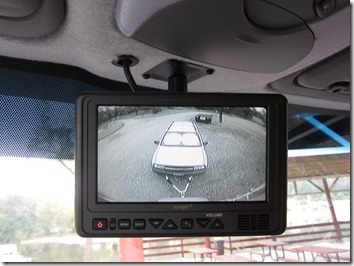
Back in the RV, I turn the rear-view camera on (and keep it on) to ensure that there are no problems (i.e. tire blowouts on the toad, disconnected cables, etc)
IMG_7671

Ready to roll!  I assure that it’s now taken longer to read this post than it actually does to perform these steps! 

Disconnecting The Toad:

So, now for a few parting tips on how to disconnect your toad properly.  You’d think it’d simply be a case of reversing the steps above (and indeed it is), but be sure to remember 2 important tips (learned the hard way from Yours Truly)!

  • Before unhitching, remember to put the car back in gear (or set the parking brake). Yes, I made this dumb mistake one day.  Thankfully, my driveway only has a slight slope and my driver’s door window was open, so I was able to run and reach in to pull the parking brake to halt my runaway Tracker!   Gave my neighbor quite a good laugh with dumb move!!!
  • Turn your toad’s ignition off if staying parked and hooked up for an extended period of time.  I once came home from a trip so exhausted that I left the toad hitched up to the motorhome for a couple of days before unhitching it.  Big mistake!  By leaving the key in the toad’s accessory ignition position that long, I had managed to suck all the power out of the battery and it wouldn’t start!  Thankfully, I was home and could charge it up again, but it was certainly another bone-head move on my part! 

Can I Tow a … With a …?

Legal disclaimer section!

Before towing anything with your Motorhome, check it’s weight/capacity stickers to confirm your Towing Capacity, Hitch Capacity, and GCWR (Gross Combined Weight Rating) to ensure it can safely handled your car’s weight.  Check the weight sticker for your car too!

Just because your car’s weight might be fine, that still doesn’t give you the green light to tow it.  In fact, fewer and fewer modern cars these days are able to be “flat-towed” or towed “4-wheels down” (meaning all wheels rolling on the pavement rather than via a car trailer or towing dolly).

The best references to check whether or not your car can be towed  this way are as follows:

  1. Your vehicle’s Owner’s Manual  (the definitive source above all others)
  2. Motorhome Magazine’s Annual Dinghy Towing Guide (published each Spring for that particular model year)
  3. Remco Towing’s Application Charts (Remco makes Lube Pumps that allow certain vehicles not listed on Motorhome Magazine’s guide to still be flat-towed if their Remco pump is installed).

Also, it’s wise to read towing-related posts on popular RV’ing forums (such as the Dinghy Towing forum on RV.net) and ask fellow RV’ers you meet about their first-hand experiences towing your particular model vehicle.  A few newer-model Fords recently had some problems with transmission failures when being flat-towed (Ford has been addressing them).  But while Ford’s Owner’s Manual, and both guides above showed these vehicles to be approved for flat-towing, actual owner experiences posted on forum sites such as RV.net revealed some major problems.   So, do your homework carefully and thoroughly before making the investment and hitching up!

How Much Does it Cost?  What’s the Impact to MPG?

Two of the most-common questions I get!  

Cost-wise, most dinghy towing setups (parts and installation labor) typically run in the $3000 – $3500 range, about half the cost will be parts and other half labor.  This can be higher if you buy your parts retail from an RV dealer (rather than online), or choose the most expensive tow bar and braking solutions.

MPG impact has been amazingly minimal for me.  When towing the Tracker through the flat Midwest, my View’s MPG is only minimally reduced when towing (less the 1 MPG difference for the 3000 lb Tracker).  In the Rocky Mountains this past summer, my climbing speeds were obviously slowed with the added weight, but even at this extreme, the MPG difference was minimal (perhaps 1.5 MPG) because every hard uphill climb had an effortless downhill coast.

Toads are Fun!
IMG_3288

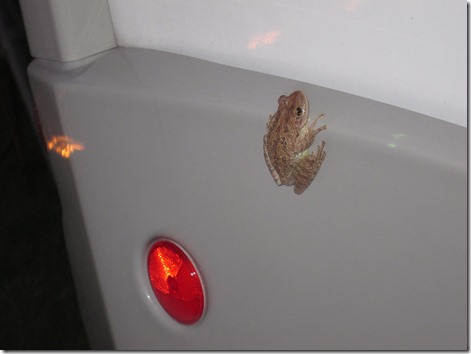
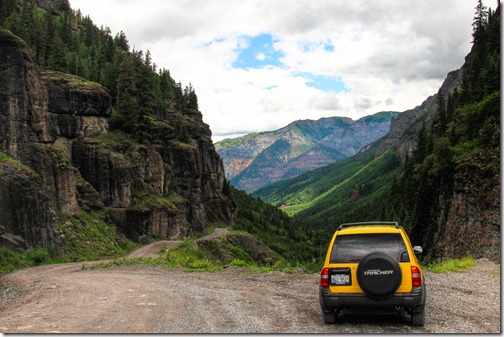
So sure, the above toad is a whole lot cuter, cheaper, and easy to hitch onto the back of an RV than another gas-guzzling vehicle!   But I like all the terrific places my little Tracker has been able to get me to (where my RV alone could not).   Toads are fun!
IMG_4588-Edit

Thursday, November 17, 2011

A few more "favorite things"

Ah the holiday shopping season is here again!  I've been noticing the UPS man starting to make daily stops to the cul-de-sac this week (or, as my brother likes to call him, "Brown Santa") -- a sure sign that the annual shopping frenzy has begun.  Have all the good little RVing girls and boys made their holiday wish lists for Brown Santa yet this year?

I treated myself to the newest craze on the Skinnie Winnie Yahoo Group site-- a pair of Bilstein shocks! (something seriously demented about a middle-aged woman dreaming of filling her Christmas stocking with...of all things...heavy-duty shock absorbers!)

But the men on the Forum all seem to rave about how well they eliminate the "rock and roll" a View typically makes whenever it drives slowly over a curb, so I can't wait to get them installed and give them a try!

Last April, I did a Favorite Things post of my fabulous folding leather ottoman, my full-bed sized camp mattress, and my bargain $7 Crock pot.  Recently, some readers have been asking to see some of the other favorite things I've commented on, but have yet to post pictures of.  So, here's my next round of "favorite things"....just in case you need a little something else to add to your wish lists!

LED TV with Clamp Mount Arm


I hated the 19" Jensen LCD TV that came with my View.  It was heavy (29 lbs) and mounted at an angle that only worked well if you were standing to watch TV (and who does that?!!).  So, when the Jensen died a quick death last year, I bought a great super-thin Vizio 22" LED TV ($249, and only 8 lbs!).  I had an old Ergotron clamp-mount computer monitor arm, so initially used that:


While that solution was rock-solid and gave me the dual option of mounting it to the dinette table to use it as a laptop monitor while working, the arm was too heavy-duty for such a lightweight TV.  I liked that the TV could now tilt and swivel for better viewing angles, but it still seemed too high up to view comfortably (especially when seated at the dinette).

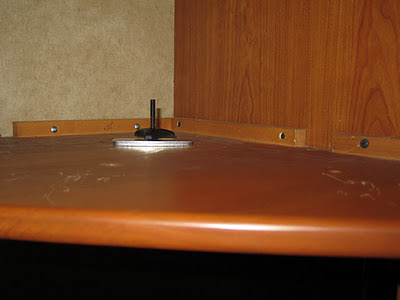
So, I then found a lighter weight Ergotron arm that could also be used upside down.  This also came with a clamp mount, but I found that it's grommet screw fit right into one of the screw holes from the original Jensen TV mount, so I decided to mount it that way instead.  This solution, not only lowered the TV to a comfortable viewing angle, but it now allowed the shelf to be used for holding my Dish satellite TV receiver!


An added bonus, is the ability to swivel the TV around so that it can be viewed out the dinette window from the outside-- instant outdoor movie theater!


In travel mode, I store the Satellite receiver in the cabinet next to the shelf.  I keep the TV mounted on the arm, and simply wrap a couple bungee cords around it to keep the arm from extending.  Now over 5,000 miles of travel-- so far, so good!

I love that the TV also has Internet apps and a built-in Wifi receiver.  From my 3G Mifi cellular hotspot, I can watch a Netflix movie, a Flickr photo slideshow, or listen to Pandora and Rhapsody music services through my TV connected to my RV speakers.  Geek out!  


Table-Mate Folding Table:


When I showed my ottoman in the April post, I forgot to show the folding table I often use with it-- the Table-Mate Classic ($45).  Ok, granted, the plastic "fake woodgrain" top looks a little cheezy, but this thing is super strong, lightweight, folds flat, and has no sharp corners or edges.  Best of all, you can prop your feet up when using it.  The perfect tray table when doing laptop work from the reclining swivel seat. So comfy!


Sodastream Soda Maker:

I've never been a coffee drinker, and always used to hate dragging those big 2-liter pop bottles from the store (especially when camping).  So, when I discovered the Sodastream home soda maker ($99) a few years ago, I was thrilled!  In addition to their online store, they now sell these at Bed, Bath, and Beyond stores, and other retailers, making it fast and easy to get refill carbonator bottles and soda syrups in what ever metro area I happen to be driving through.


This is an ideal system for RVs.  No electricity required.  No heavy bottles or cans to store (just the small syrup bottles and the 1-liter soda bottle), and lots of interesting flavors besides the traditional Cola, Root Beer, 7up, and Dr. Pepper choices.  Best of all, you'll always have freshly carbonated soda-- no more "flat" stale pop!

This summer, I was hooked on their Strawberry Kiwi Green Tea and mixed it with just regular (rather than carbonated) water -- very refreshing!  I like that their soda mixes have a lot less sodium than traditional sodas.  It's also fun to create your own more natural mixes, such as carbonating some fruit juice.  If you like sodas, treat yourself to this tasty system!

So what's on your RVing "Wish List" this holiday season?


Tuesday, November 15, 2011

Recent Enhancements to the Blog

If you read Winnie Views from an RSS Reader and have not visited the blog’s homepage recently, I’ve added a few new features and links.  Frankly, I stole these ideas from some of the other great RV blogs I read, so figured I’d better give thanks appropriately where it is due.

IMG_3147
First, I’ve added new About Us and Our View tabs at the top of the page.  Ever since seeing these a few months ago on the my friend Evelyn’s blog, Travels of Evelyn and Steve, I’ve been meaning to create similar tabs here.

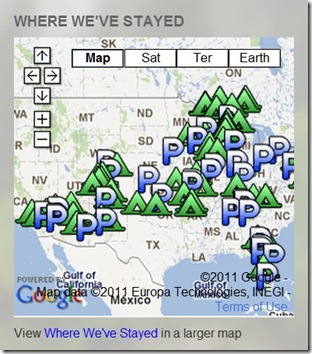
I used to have one of those pictures on my blog with all the states and provinces colored in of where we’d been with the View.  Quite colorful for sure, but it didn’t help me remember all the good places I’ve stayed or had parked overnight.  Then, I saw Judy over at Travels with Emma, add a terrific Google map to her blog of all the places she had stayed and hiked.  What a terrific idea!  I had long been using the My Places feature of Google Maps to create my own custom maps whenever I started planning a big trip—noting all the photo and camping locations I might want to visit.  But, I had never thought to create a map after the fact of Where We’ve Stayed, and link those places back to our blog posts and/or website of the park.

Wherewevestayed

Full-time RVers Fred and Jo Wishnie have a great link on their blog, The Wandering Wishnies, to all of their campground reviews posted to RVParkReviews.com.  I, too, have used this site for years to post feedback on all the parks I’ve visited and it’s a terrific resource to get true, honest, opinions from fellow campers.  So, I’ve now added a link on my blog to all of my RVPark reviews as well.

_MG_3739
This past weekend, I finally figured out how to create a Winnie Views Facebook page for the blog.  While many folks are comfortable using an RSS reader or the Follower feature of Google Blogger to be notified of their blog updates, there are others who prefer to just get their blog news and friend updates all rolled into their Facebook feed, so we’re now doing that…neat that we already have 11 people that “Like” that page in the first two days.  Cool!

I like the way Cherie & Chris from Technomadia keep their Facebook page updated—not only do they re-publish their blog posts there, they also use it to post short little updates, thoughts, and questions in between their posts.  It’s also a nice way for friends to post their ideas and feedback as well.

So, hope you find these updates useful.  Now, lets all start some conversations!

Sunday, November 6, 2011

What I like about my View & What I wish it had

IMG_4689-Edit

One of this blog’s readers, Lady Vagabond, asked a while back what I liked most about my RV.  The last post answered why I chose a Class C motorhome, so this post dives a bit deeper into the specific things I like about my View (as well as some things I wish it had).

First off, it bears repeating whenever considering an RV purchase: “There is no perfect RV!”   Every RV is a complex set of compromises—each vehicle excels at some things and misses the boat entirely for others.   That’s why we usually buy and sell them so often Smile

Right now, I like most things about my Winnebago View and can live with most of the things I don’t like.  But that’s not to say that in a few years, I might decide a Class A would make a better full-time home…and that will come with a whole new set of compromises.  Again, no perfect RV!

Overall Size:
IMG_6136

I really like the View’s overall width, height, and short wheelbase.  It’s a foot less wide that most other RVs, and that comes in very handy when parking in a normal parking space, driving through construction zones or on curvy, narrow mountain roads. On the inside, though, it’s pretty cramped for me and the dog to move around if I don’t extend the slide-out. 

The View’s short 170” wheelbase makes it very nimble to maneuver through small campground loops, crowded gas stations or do u-turns on most 2 lane roads (even when towing a car!).  If I were driving a longer RV, I’d have less turning radius and would be more limited in which gas stations, restaurants, strip malls, or campgrounds I could get into.

On the flipside though, if my View were even just 5-8 feet longer, it could have a real bedroom in the back, more living room space, and more storage—all things I dearly miss at times in a short 24’ RV.

Engine/Chassis:
Ever wonder why there are so many Sprinter-type vans on the road?  You see them everywhere!  FedEx, DHL, and numerous small businesses use them for their fleets because they get good gas mileage, and have a very reliable, long-running Mercedes-Benz turbo diesel engine.  FedEx Sprinters regularly go into the 500,000 mile range, so I’d never shy away from a used View with, say, 70,000 miles on it—it’s just getting started!

My View gets about 13 mpg in most conditions when towing the Tracker going highway speeds (i.e. doing 70 mph out West).  While that’s not the 15-17 mpg advertised, it’s better than what Class C gas engine units get, and much better than any Class A.

The diesel engine has sufficient torque and power for most conditions except when pulling a tow car up a steep mountain, and in that situation, it still manages to do the job, just at a bit slower speed than if it weren’t towing.   Overall, I’m much more comfortable with my View’s engine and transmission than I used to be with my Subaru towing a small T@B trailer.

Many Class C’s use the Ford E-series chassis and F450 V10 engine.  That too is a very solid combination, and highly serviceable by thousands of dealers.  It’s also a very easy unit to drive, but for me, I’ve liked the Sprinter’s larger windows, the various storage areas in the front dash and above each visor, and the more open cab area.  I like the additional leg room and not having to squeeze around the center “doghouse” engine compartment (like in the Ford) if trying to move between the cab and the coach. 

The downside of my particular model year (and earlier Views) is the 3500 lb towing capacity.  Newer Views and most Fords can pull 5000 lbs giving you more “toad” options.

Additionally, my View (and most Class Cs) have limited CCC (Cargo Carrying Capacity) of 1000 lbs or less.  They’re designed for short vacations, and not for bringing all your worldly (and heavier) possessions.

Exterior:
IMG_1665

My View’s external cargo capacity is at the minimum limit of what I’d consider usable.  My rear storage contains my BBQ grill, a 9 x 12 patio mat, awning lights, an LP campfire unit, a 10g LP tank, a small folding table, and various odds and ends.  My pull-out slide compartment contains 2 large ramps and (4) 2 x 10 wood planks (used for leveling the RV), a telescopic squeegee, and jug of windshield washer fluid.   A smaller side compartment holds extra quarts of special motor oil that the View’s diesel engine takes, a small air compressor for inflating tires, and a spare battery charger.  On the driver’s side, there’s a large utility compartment that carries (2) 25’ water hoses, a 15’ sewer hose and various fittings, 25’ of TV coax cable, and 50’ of 30amp electric cable plus my Surge Protector box. I don’t know where I ‘d put this stuff if that compartment were as small as some of the View Profiles or Via/Reyo units I’ve seen!

I’ve got sufficient room for all important items that I need to keep outside, but could still benefit from additional external storage.  Right now, I must carry my folding lawn chairs inside the RV, and prior to getting a toad, I also had to carry my inflatable boat inside the RV, and carry bikes on a bike rack.

If I had a taller/wider Class A motorhome, I’d have more external space to carry these items.  It’d also provide larger fresh water and holding tanks than what I have now allowing for longer boondocking time between dumps.

Living Area:
My View’s 70” long sofa is nice for stretching out on to watch TV—I’d not want a sofa any shorter than that!  It’d be even nicer, though, if it were a few inches deeper and a bit less firm.  To overcome this, I use a few rectangles of 2” memory foam that fit inside of pillowcases.  These easily store in the overhead bunk area when not in use and make the sofa much more comfortable.

IMG_3387

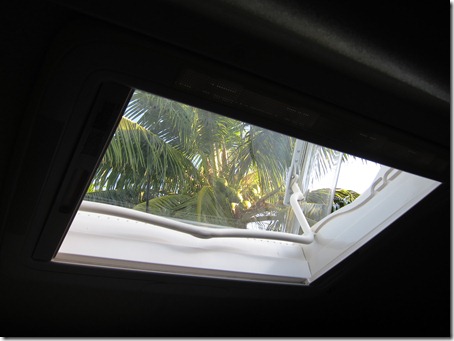
One unique thing about Views, up until around model year 2010, is their large skylight hatches in the living area.  I absolutely love being able to let the sun shine in on a cold winter day when snowbirding, or being able to open the hatch (along with opening the bathroom fan) to let lots of fresh air flow through the coach while leaving the windows/doors locked.  Really sad that newer models did away with this feature!

The dinette is functional and has a good-sized table.  It’s fine for 2 people or 2 adults and 2 small kids to each meals at.  It becomes a bit more challenging when trying to sit at it all day as a home office desk.  

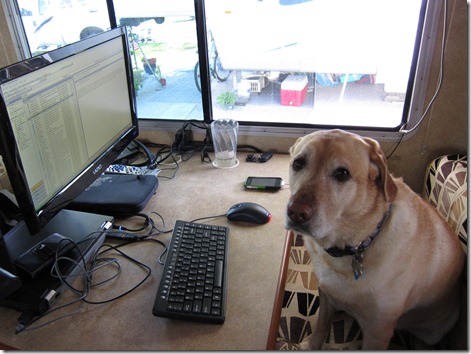
When at home, I plug my laptop into a large 24” computer monitor for detailed project work.  I also have an ergonomic full-sized keyboard and a rocking/swiveling office chair.  I’ve tried a variety of solutions in the RV to mimic this environment, but haven’t quite found anything ideal yet. 

IMG_3289

One option has been using my 22” TV in the RV as a computer monitor.  Another has been to sit on a folding rocking lawn chair or on the swivel/reclining cab passenger seat rather than at the dinette.  Neither are as ideal as my home office, though.   I’d dearly kill for a comfy, rocking/swivel Euro recliner, or at least a dinette with free-standing chairs that could be swapped out for my office chair.  Just not enough room in the View for either of those options.

Kitchen:
rvusap484663_5thumb_550x410

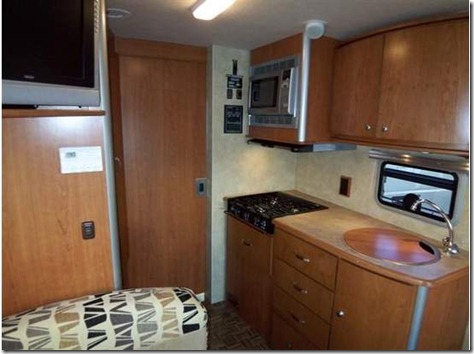
The View’s kitchen is one area that I’m most pleased with.  I love the large round sink that easily fits plates and large pots/pans for washing.  I also like that all the cabinets and drawers are just the right size—there’s a large drawer beneath the stove that holds all my nested pots/pan set and some baking pans, and the bottom drawer of the drawer stack is tall enough to fit all my small appliances—a toaster, coffee maker, and crock pot.  The drawers are also wide enough to fit most Rubbermaid silverware divider inserts and other organizers, and the top overhead cabinets are roomy enough for all my dishes, cups, and food storage containers.

I bought a stove cover which adds more countertop space and provides a backsplash when cooking.  I’ve also really enjoy the convection oven feature of the microwave.  It cooks a pizza absolutely perfectly, and does fine with small baking and roasting as well.

Perhaps the most-beloved feature of my kitchen, though, is the pantry closet.  I’m often amazed that many RVs don’t have these and force you to stuff food into any overhead storage compartments you can find in other rooms of the rig. It’s so convenient to be able to quickly turn around and grab something out of the pantry when cooking.  The shelves are deep and hold a lot!

Now that I’m used to the View’s 2-door Fridge/Freezer, I’d not want to go back to anything smaller. It provides plenty of room for a week’s worth of food.

Bath:
rvusap484663_7thumb_550x410

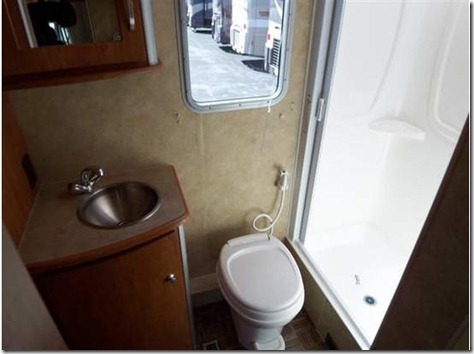
I really enjoy the open feel of my model’s full-width bath with it’s large rear window.  When sitting in the swiveled passenger seat and looking to the rear, I have nice views out all directions.   The bath also has a good sized closet so you can get dressed in the bathroom if traveling with others.  I also appreciate the generous storage space in the medicine cabinet and sink vanity.

The shower is good-sized. Cozy, but not cramped.  I also really love the shower’s frosted skylight—why aren’t home showers as nicely illuminated?  When traveling, I put a towel down on the shower floor and store large items such as dog food bags, spare water containers, or excess shopping bags.  I’ve heard of others keeping their kitty litter boxes there too.

Bed:
IMG_5116

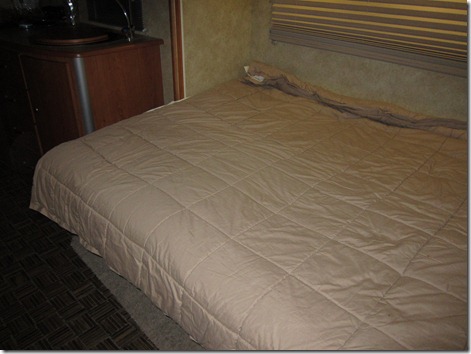
It’s nice to be able to sleep up to 5 people in the View when needed.  Many folks with my model sleep on the pullout sofa, on the overhead bed, or both.  But I typically use my overhead bunk area purely for storing lightweight bedding items and duffle bags of clothes or other gear.  Since the View’s jackknife sofa is not that comfortable on it’s own, I use 2 camping mattresses velcroed together along with a double-wide Travelsak sleeping bag and pillows.  I keep all of that stored in the bunk area during the day so it can easily be moved to the sofa at night.  If guests come along, I bring extra Travelsak bags and pillows and keep those up there as well.

While the camp mattress and bedding solution for the sofa is fine for a few months, I’d dearly love a real bedroom with real bed mattress if living in the RV any longer than that.  RV bedrooms also usually have larger closets and drawers for additional clothes (I currently need to use hanging organizers in the closet for my non-hanging clothes).

Other comforts of home:
When returning home after a few months of travel in the View, there are a few things I dearly look forward to.  If I were full-time RVing, I’d want to try and get solutions for these inside my rig:

  • Besides the recliner and real bed mentioned above, I’d love to have an onboard washer/dryer.  I hate having to lug piles of clothes to Laundromats!
  • While I enjoy my outdoor LP campfire when camping (as I’m a complete klutz at trying to make a real campfire), it’d be nice to also have a small electric fireplace/heater on colder days.  Having a real table lamp is also something nice to come home to.
  • A piano!  I don’t play it as often as I used to, but do enjoy it.  I’d love to have enough storage to bring an electronic keyboard with me when traveling.

UPDATE – May, 2014:
If you’re a new reader to WinnieViews, check out this update to the above post comparing my new J-model View to the one above.  I’ve now got an even more comfortable home!

Lynne's Camera Bag

Best RVing Stuff Under $50

Join Us On Facebook